
Step by step on how to install the Victory 4x4 Pet Divider for the 5th Gen 4Runner.
Questions or Support:
Phone: 269-353-1184
Email: info@victory4x4.com


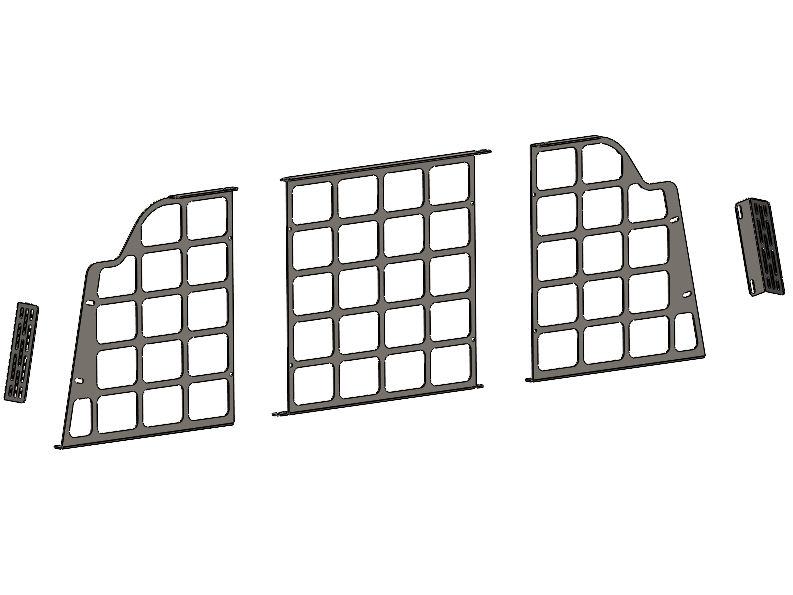


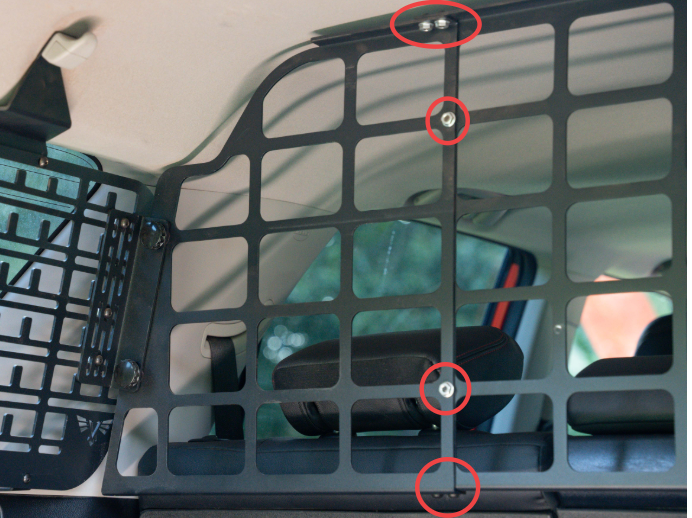
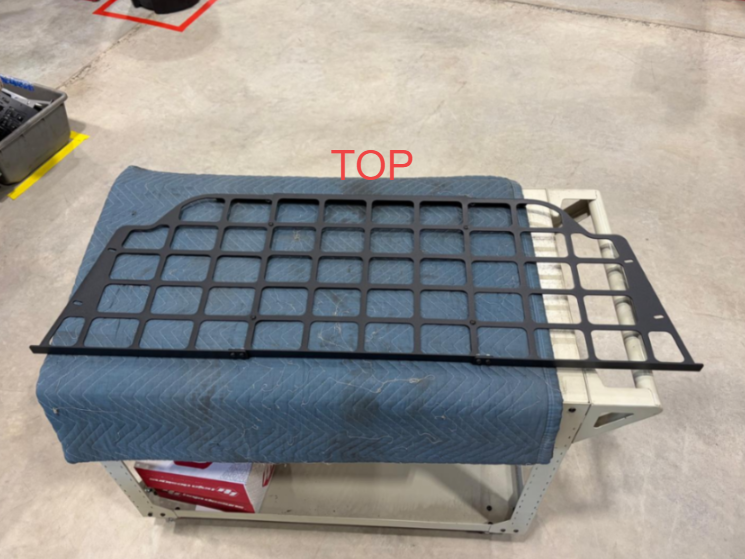
- Begin by assembling the panel using 12 of the provided 1/4” bolts, washers and nuts. The top of the center section had a “T” between the bolt holes on one side to make it easier to tell the orientation. Make sure each panel is oriented correctly, as shown in image 3, or the bolt holes will not line up.
- Keep everything loose until all bolts are started, then tighten them all.


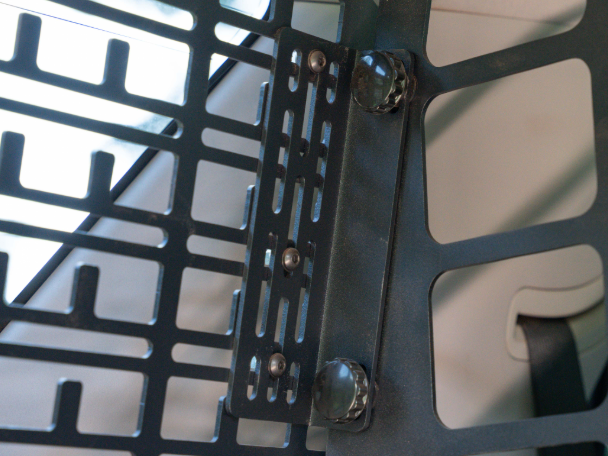
- Loosely install a mounting bracket onto each molle panel with the flange towards the front of the vehicle using 6 total of the provided 1/4” bolts, washers and nuts. There is no specific way they need to be bolted in, the extra slots provide many options to choose from.
*If installing on a non EDC panel, there will be smaller, designated slots towards the front of the molle panel to mount the brackets to.


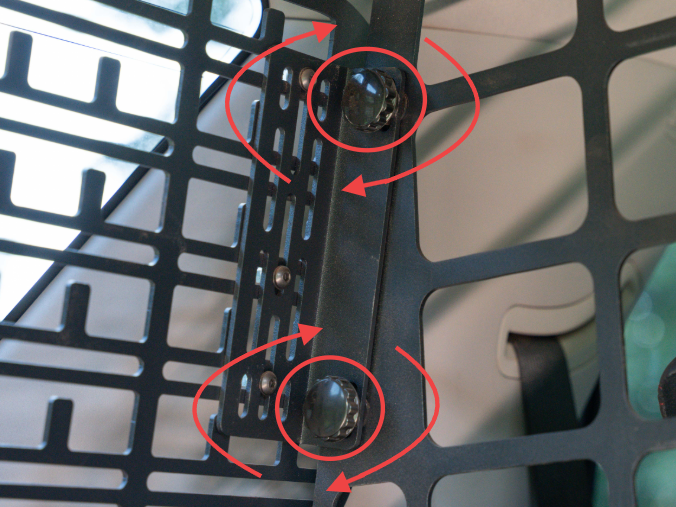
- Orient the pet divider so that the flange on the bottom is pointing towards the front of the vehicle. Then, push the carriage bolts in through the front of the panel and retain them in place using the provided plastic retaining washers.
- Lift the panel up into place on the mount as shown and secure it in place using the provided knobs.
Note: The knobs can be flipped to provided easier access from the back seat rather than the cargo area if desired.

- With the panel loosely installed, adjust the height and position of the panel and mounting brackets and tighten all hardware once it is how you want it.

- Confirm all hardware is tightened.
- Congrats! Your installation is now complete. Enjoy!
HELP CENTER
Articles & Guides
GembaDocs Onboarding SOPs
15 Min - SOPs, Guide

New: How to Create, Assign and Track Training Courses
6 Min - Guide

Learn GembaDocs
2 Min - Guides and Video
SOP vs Advanced SOP Guide
10 Min - Guides and Video
Explore
Support Hub
Lean Cave
GembaTalk
More Resources
Bugs & Improvements
Suggest an improvement, or report a bug, direct from the app/platform.
API Documentation
Connect GembaDocs with external systems