
- Tools: hex keys, wrenches/sockets, utility knife, clamp.
- A helper is needed to lift the rack.


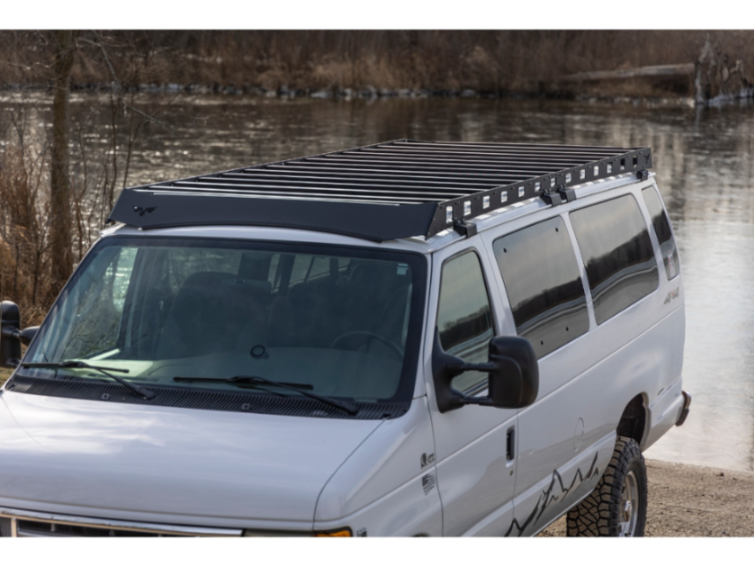
Install the Victory 4x4 E-Series Van Roof Rack (VFDVRK) on a 1992+ Ford E-Series van. No drilling required.


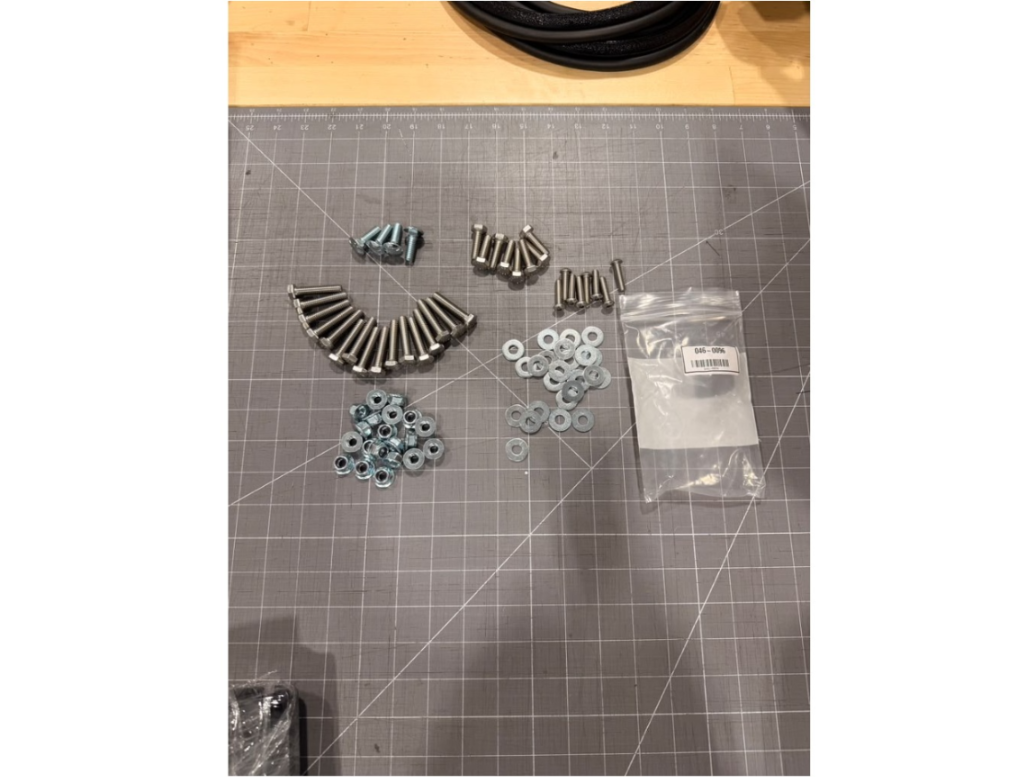
- Open the hardware bags and lay out the hardware.
- Sort the 1/4" hardware (button-head bolts, washers, serrated flange nuts) from the 5/16" hardware (hex bolts, carriage bolts, flat washers, flange locknuts).
- The T-nuts and 1/4"-20 x 3/8" button heads are only used with the light bar option.


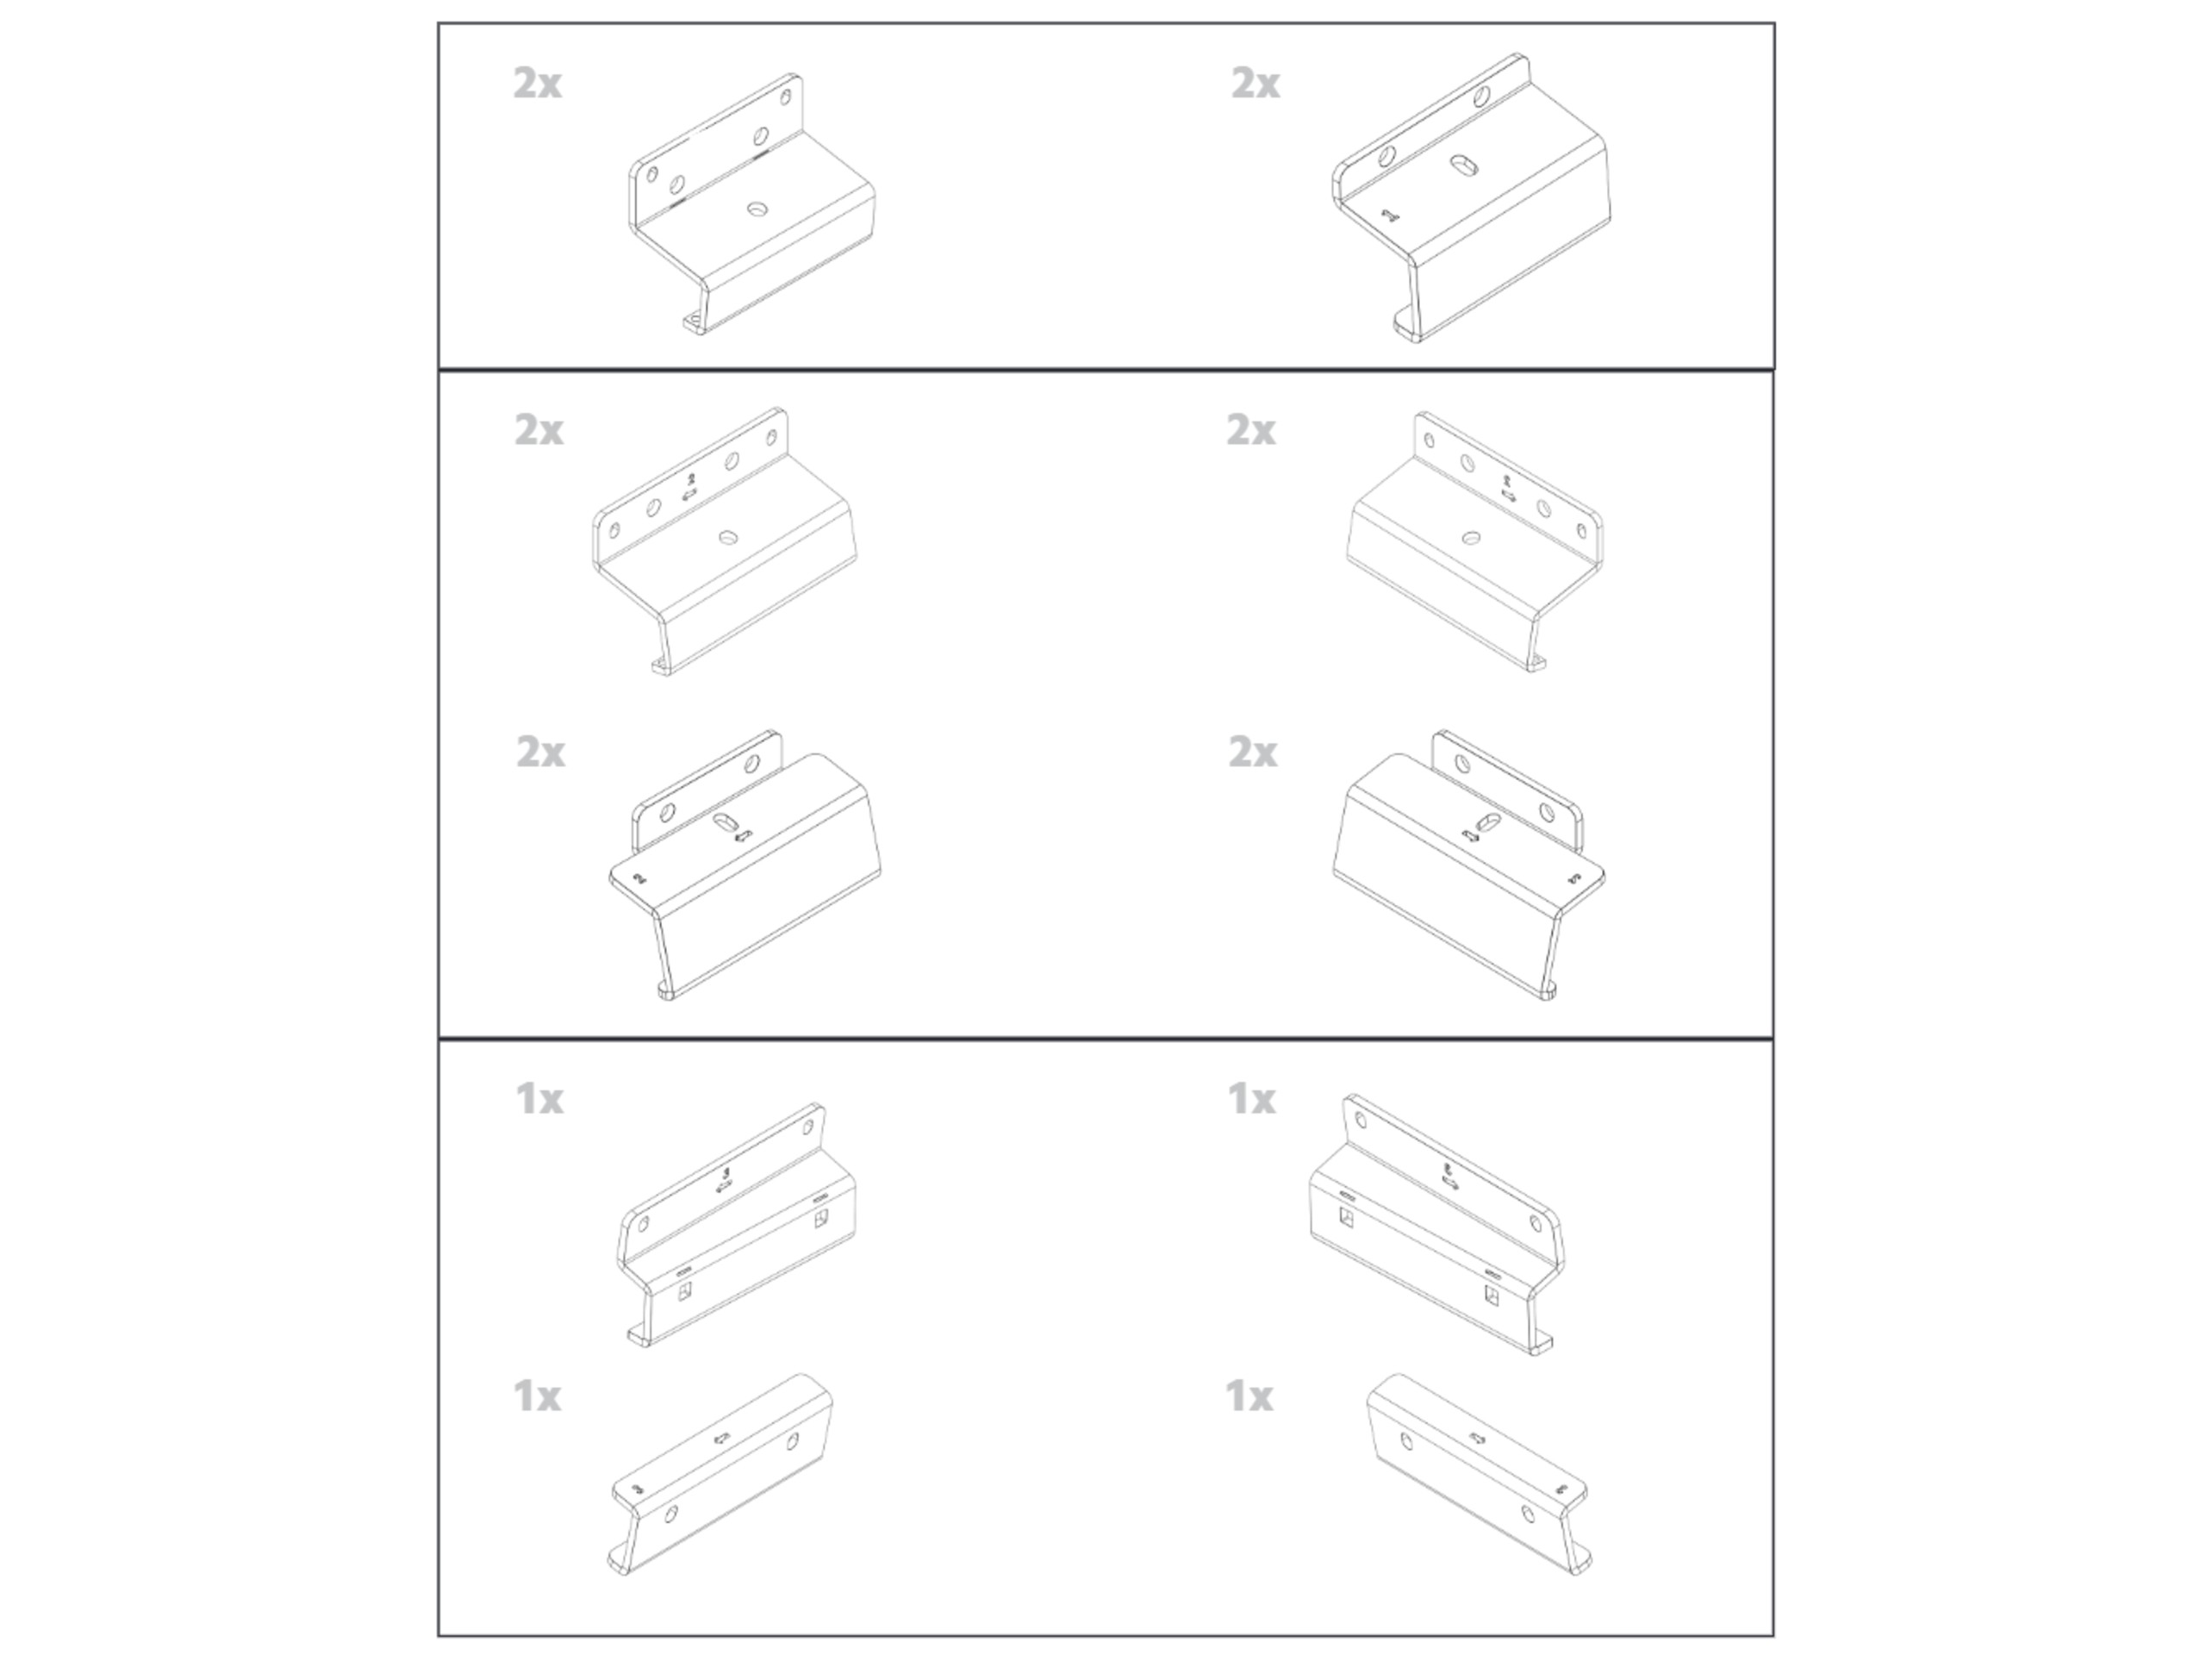
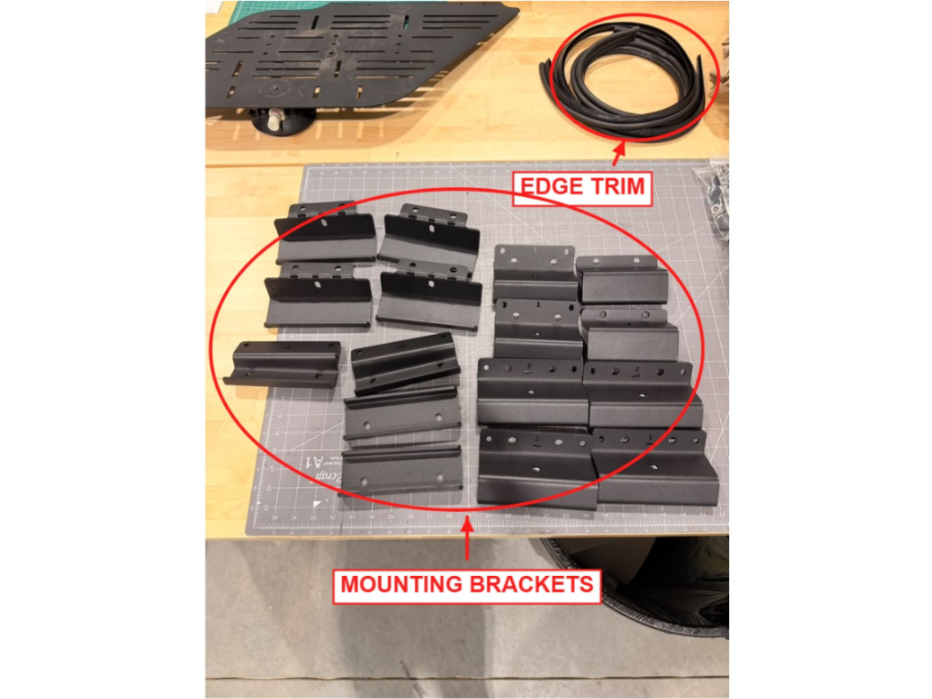
- Lay out the side rails, crossbars, front and rear fairings, connecting brackets, mounting brackets and edge trim.
- Compare them to the pictures. The extended body kit has more crossbars and longer rails.
- If anything is missing or damaged, contact Victory 4x4 support before starting.


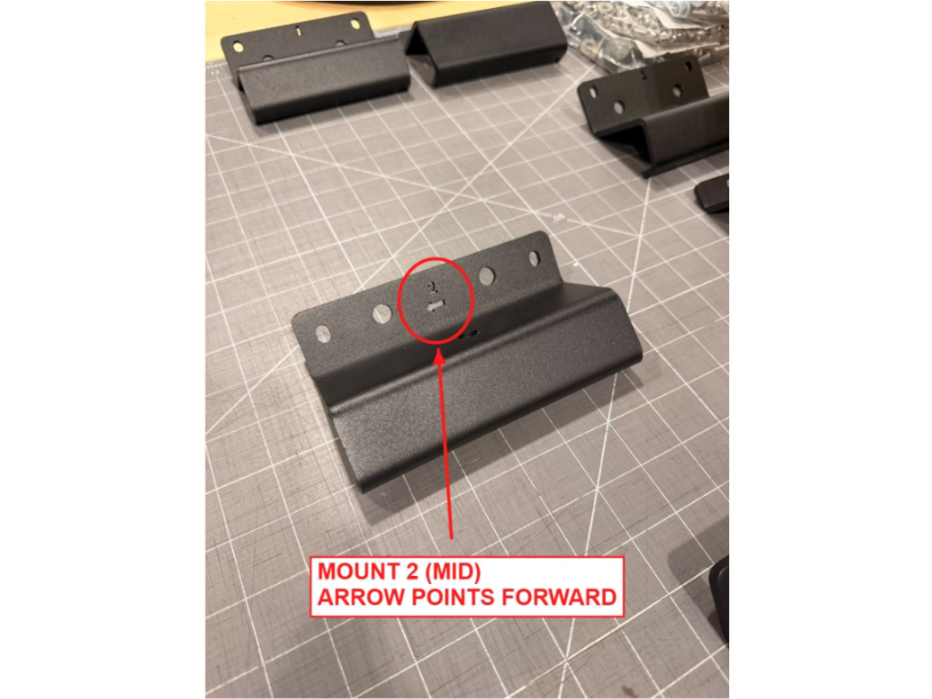
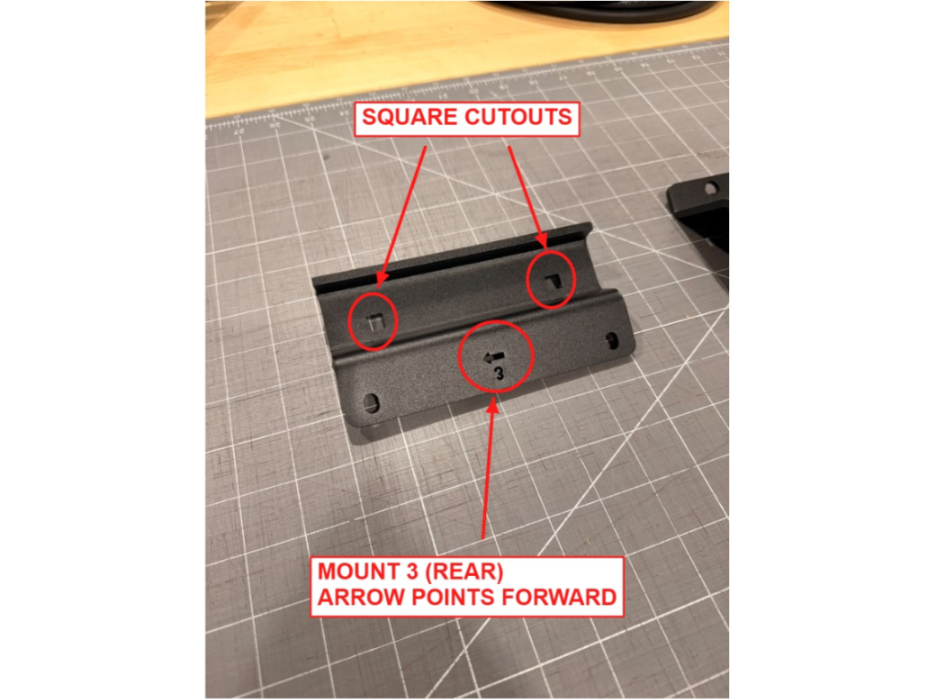
- Each inner mount is stamped with a number and an arrow.
- 1 = front mounts, 2 = mid mounts, 3 = rear mounts (square cutouts for carriage bolts).
- Always install the mounts with the arrow pointing toward the front of the van.

- Assemble both halves of the rack on the ground.
- Mount the crossbars between the two side rails with 1/4"-20 x 3/4" button-head bolts and 1/4" washers (2 per bar per side).
- Keep the machined slot in each crossbar facing up so T-nuts can be added later to mount gear.

- Press the edge trim onto the bottom edge of the front fairing. Start just outside the peak of the bottom edge and continue to the same point on the other side.
- Cut off the extra trim, then cut the extra in half.
- Install the two pieces on the bottom edge of the rear fairing wherever it touches the roof.

- Bolt the fairings to the side rails with 1/4"-20 x 3/4" button-head bolts, 1/4" washers and 1/4"-20 serrated flange nuts.
- Front fairing: 3 bolts per side. Rear fairing: 2 bolts per side.
- Slide the front fairing all the way up so it will not touch the roof, and leave its bolts loose for adjusting later.


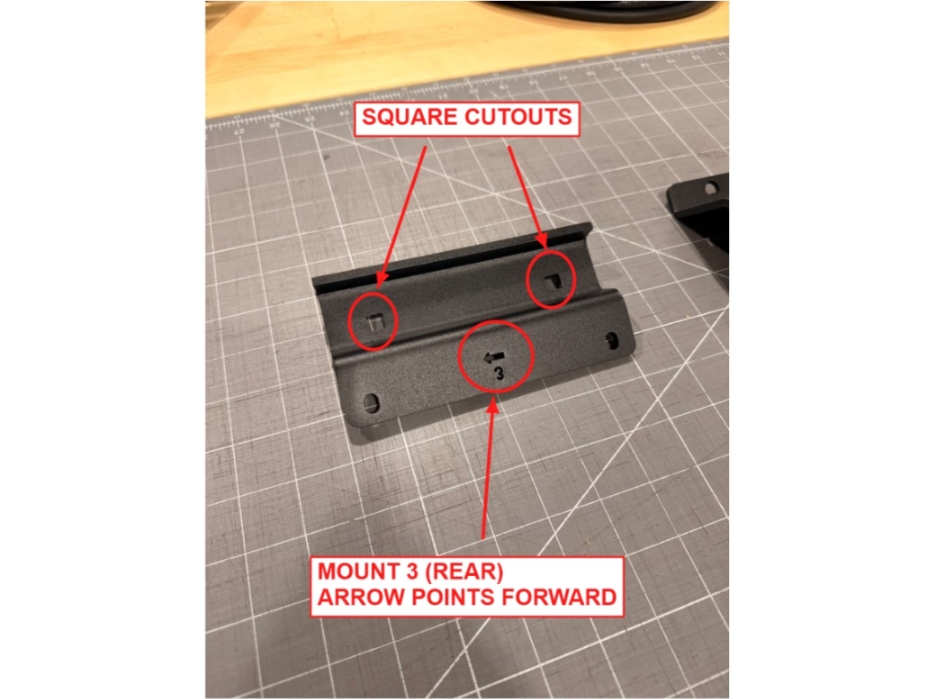
- Put the 5/16" carriage bolts into the square cutouts in the 3 mounts before installing them.
- Bolt the 1 and 3 mounts to the inside of the side rails with 1/4"-20 x 3/4" button-head bolts, 1/4" washers and 1/4"-20 serrated flange nuts. Tighten fully.
- The front (1) mounts go on the second set of holes. Arrows point forward.


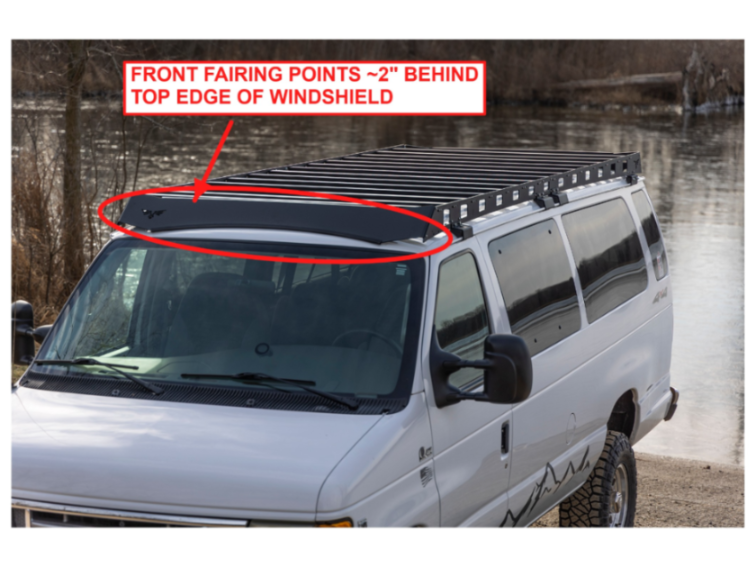
- With a helper, set both halves on the roof.
- Join them with the connecting brackets, using 1/4"-20 x 3/4" button-head bolts, 1/4" washers and serrated flange nuts in the top 2 holes only. The other hole is used later.
- Position the rack so the points of the front fairing sit about 2" behind the top edge of the windshield.

- Lift the rack slightly and bolt the 2 (mid) mounts to the inside of the side rails.
- Use 1/4"-20 x 1" button-head bolts, 1/4" washers and 1/4"-20 serrated flange nuts. Tighten fully.
- Arrows point forward.


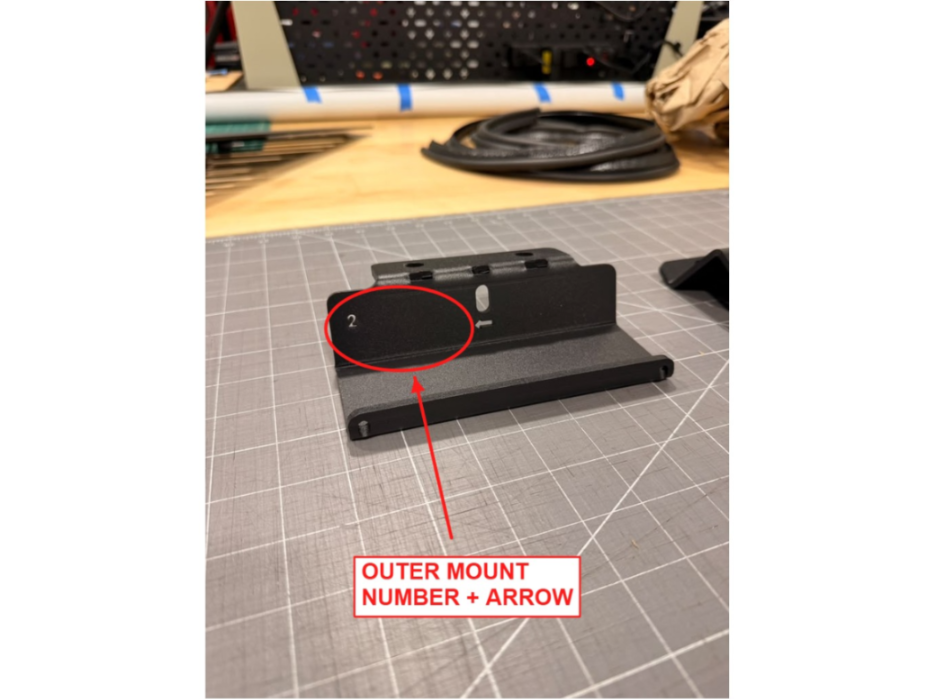
- Bolt the outer mounts to the side rails with 5/16"-18 x 1-1/2" hex bolts, 1/4" USS flat washers and 5/16" flange locknuts. Leave them loose.
- The roof gutter must sit between the inner and outer mounts.
- Open and close the front doors to check clearance. If a door hits a mount, slide the whole rack back until it clears.


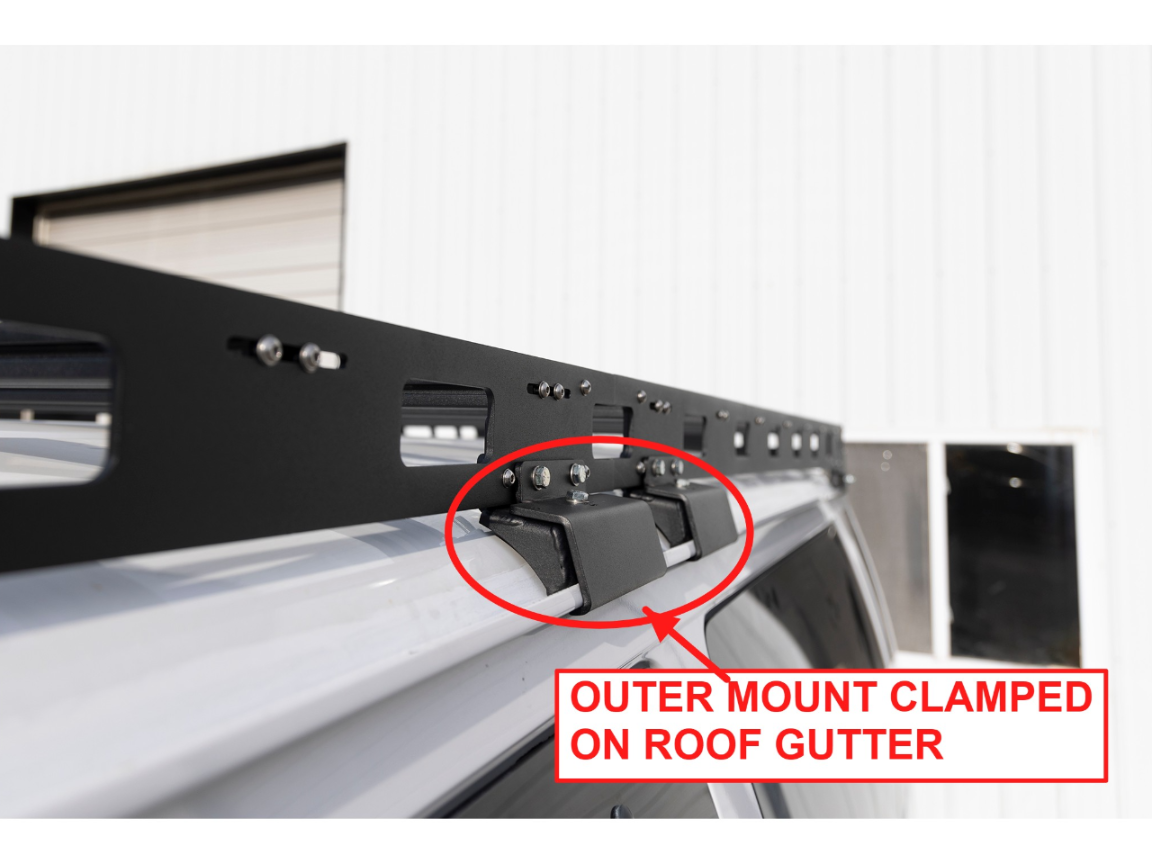
- Use 5/16"-18 x 1" hex bolts, 1/4" USS flat washers and flange locknuts to snug each outer mount to the top of its inner mount. Leave it able to move.
- Tighten the outer mounts to the side rails so they clamp the gutter, alternating side to side to keep the rack centered.
- Then fully tighten the outer mounts to the inner mounts. A clamp can help pull the mounts together.

- Push the front and rear fairings tight against the roof and tighten all hardware.
- Clear 3M paint protection film is recommended where the trim and fairings touch the roof.
- The rack is held on only by clamping force. Some bracket adjustment may be needed. Recheck all hardware after the first few drives.


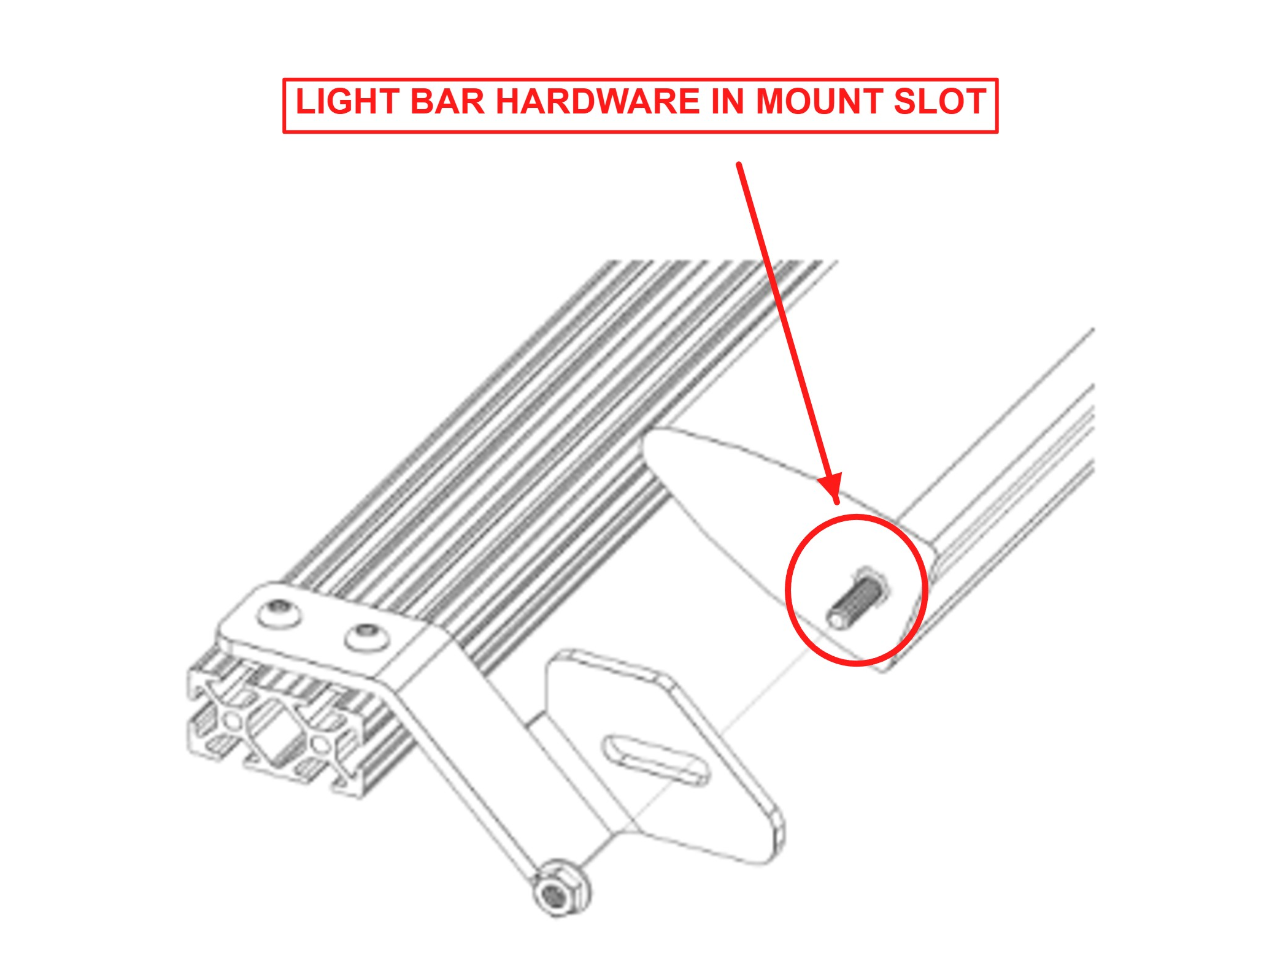
- Only for the light bar cutout version.
- Slide 2 T-nuts into the channels on top of the front crossbar. Set a light bar mount over each pair and loosely bolt it with 1/4"-20 x 3/8" button heads.
- Mount the light bar in the slots with the hardware supplied with the light bar. Center it, then tighten. The crossbar may need to be moved in its slot.


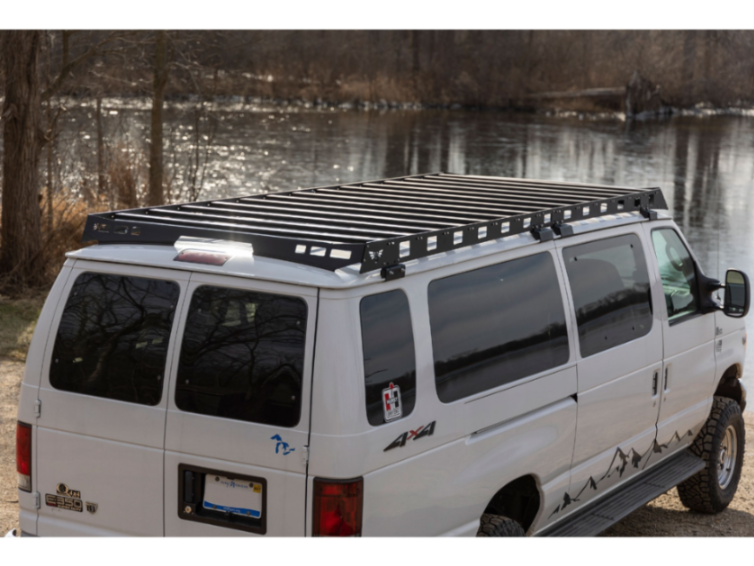
The Ford E-Series Van Roof Rack install is complete. Load rating: 300 lbs dynamic / 800 lbs static, evenly distributed. Thank you for supporting American-made!
Questions or Support: Phone: 269-353-1184 Email: info@victory4x4.com
HELP CENTER
Articles & Guides
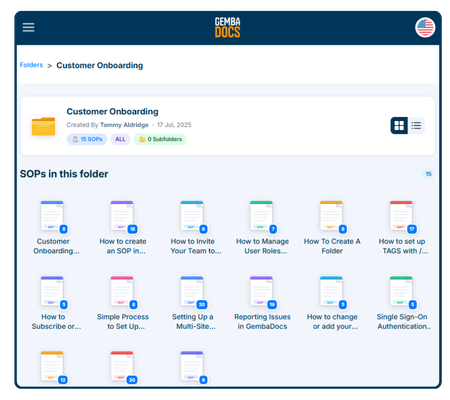
GembaDocs Onboarding SOPs
15 Min - SOPs, Guide

New: How to Create, Assign and Track Training Courses
6 Min - Guide

Learn GembaDocs
2 Min - Guides and Video
SOP vs Advanced SOP Guide
10 Min - Guides and Video
Explore
Support Hub
Lean Cave
GembaTalk
More Resources
Bugs & Improvements
Suggest an improvement, or report a bug, direct from the app/platform.
API Documentation
Connect GembaDocs with external systems