
Step by step on how to install the Catalytic Converter Skid on the 1st Gen Bronco Sport.
Installation Video: https://www.youtube.com/watch?v=gOadSMg6Mp0
Questions or Support:
Phone: 269-353-1184
Email: info@victory4x4.com


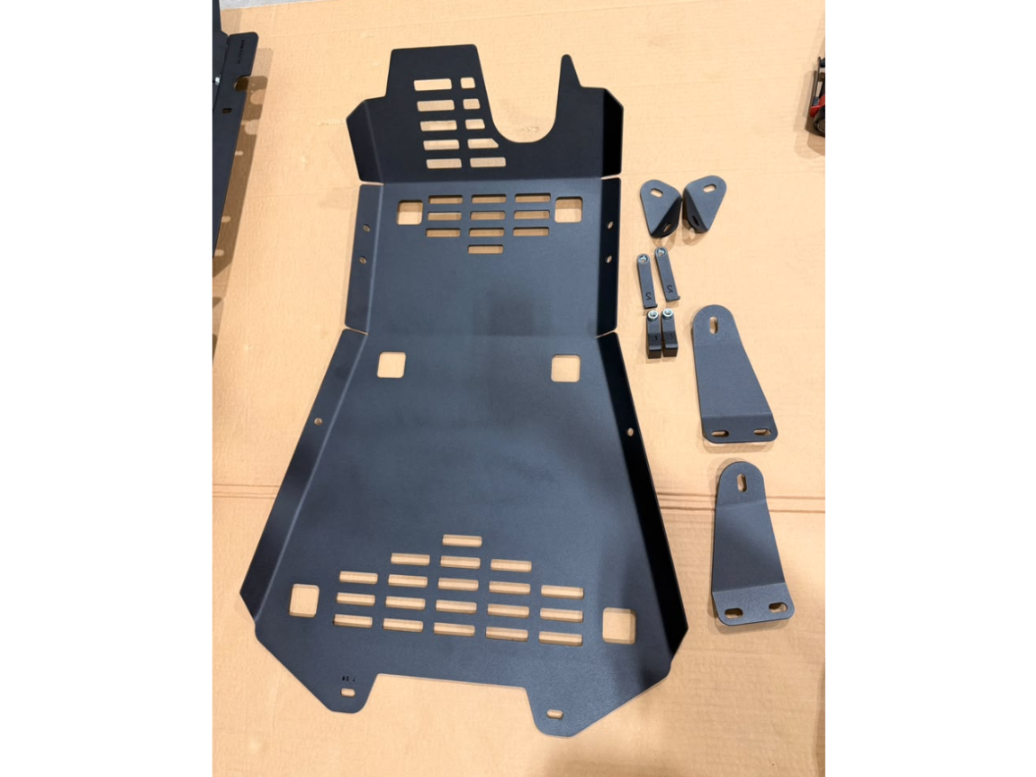
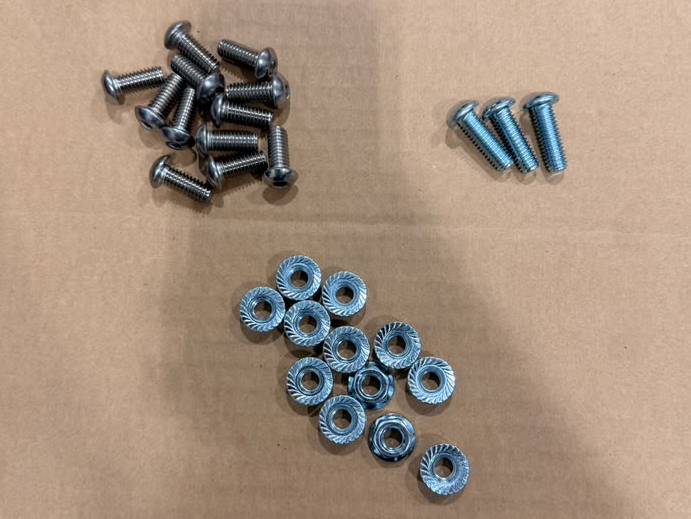


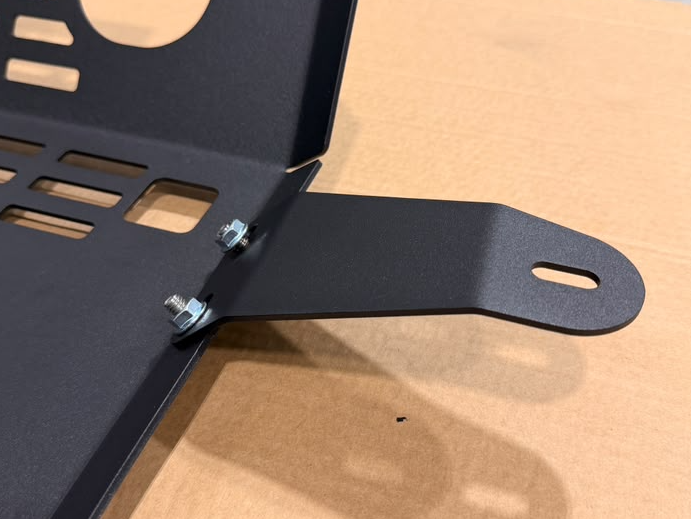
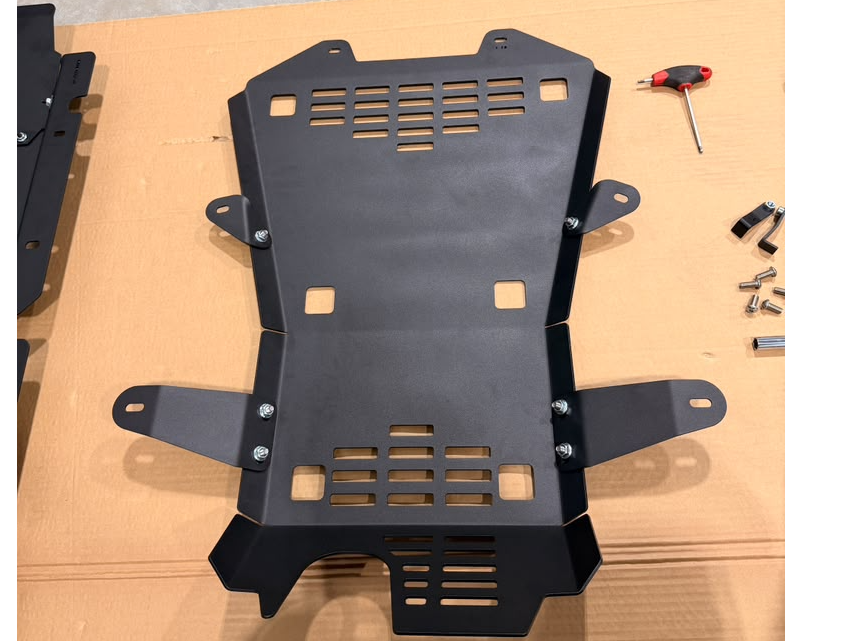
- Loosely install the mounting brackets to the sides of the skid using the supplied button heads, washers, and nuts.
- See image 3 for each placement and orientation of the mounting brackets. Make sure to leave them loose.


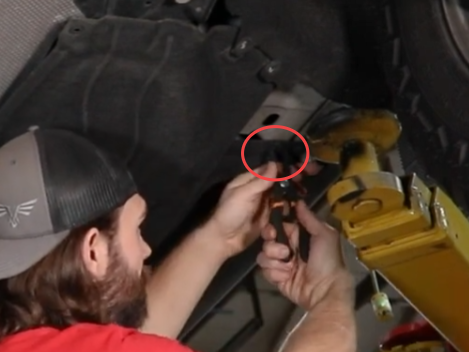
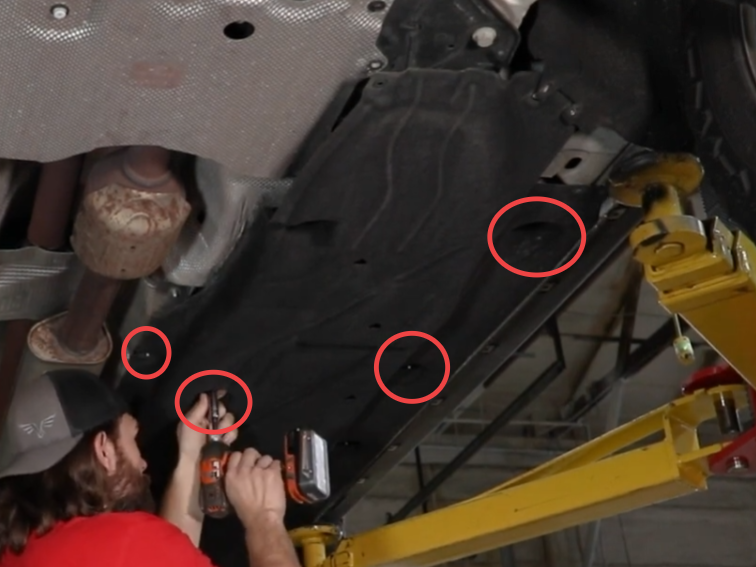
- Using a T30 torx remove the 3 front fasteners as seen in image 1.
- Using pliers or a flathead screwdriver remove the clip on the front outside edge of the splash guard as seen in image 2.
- Using a 10mm socket remove the stamped nuts as seen in image 3.
You can remove the entire thing or just the front half to access a few bolts.

- Using the T30 torx remove the 4 factory fasteners shown in image 1.

- With that factory skid out of the way, there will now be a white clip that is exposed in each of the factory mounts, as shown. Both of these will need to be removed. You should be able to reach over the top and pinch the two tabs together before pulling down to remove.

- Next, you will take the provided nut tabs labeled with the number “2” on them. You will be inserting them into the two larger holes in the middle crossmember, as pointed out below. Once inserted, make sure the nuts are lined up straight back toward the rear of the vehicle, the driver side will line up with a small square hole and the passenger side will line up with a small round hole at the back of the crossmember.

- With the nut tabs up in the crossmember and lined up with the correct holes you can now take the provided skid plate, with the help of a friend or a jack, and line up the front holes of the skid to the nuts on the nut tab. Start to loosely install them using the provided 5/16” button heads.


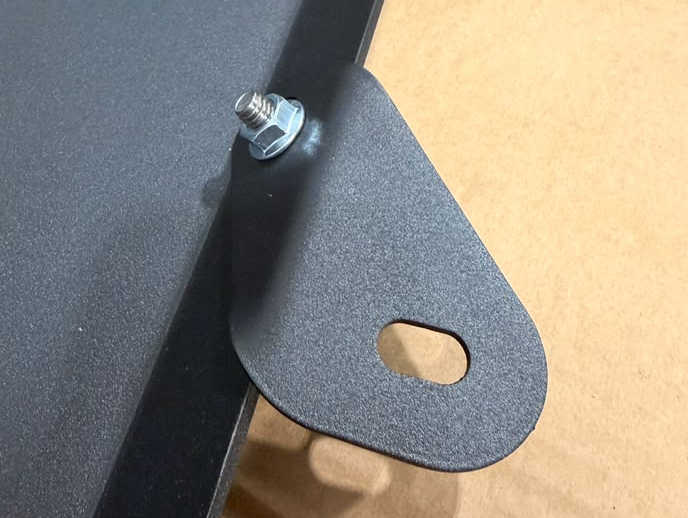
- Using the 5/16” button heads and flange nuts. Loosely install the bracket using the middle hole on the skid, as shown, you will need to reach over the top of the skid to install the nut onto the back side. Once the bracket is loosely in place, you will bolt the other end to the factory mount, using the hole that the white plastic clip was removed, you will also need to reach over the factory bracket to get the nut on to the backside. Repeat this process on both sides, refer to the image below for reference.

- You now need to take the other provided nut tabs labeled with a “3” and place them up through the large hole just above the corner of the factory heat shield. Once the tab is in the hole, make sure the nut is in line with the next hole right behind it toward the rear of the vehicle. Refer to the image below for reference. Be sure to repeat this process on both sides of the vehicle.


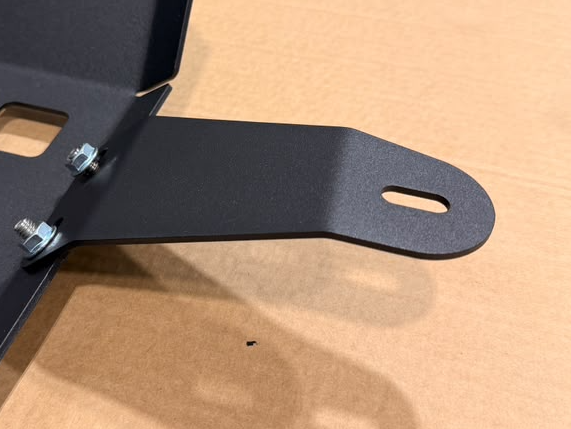
- With the front of the skid and the front mounts now loosely secured, there will be enough support to hold the weight of the skid without the help of a friend or a jack. Using the 5/16” button heads and flange nuts, loosely secure the brackets to the rear holes on the skid, as shown. Repeat this process on both sides of the vehicle.

- After everything is loosely on the car you can start tightening down each bolt and positioning the skid as needed.


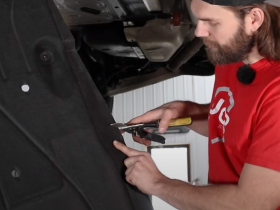
- This next step will require some trimming of the factory splash guards that were taken down on the first step, if you choose to put them back on the vehicle. You will need to loosely install and hold up the splash guard in line with the studs to get a measurement. When aligned, take a sharpie and mark 1/2” in front of and behind the rear bracket where it comes in contact with the splash guard, and then again from the flange on the splash guard that contacts the skid.
- Once you have your cut lines marked, take the splash guard back down off the vehicle to make the cuts. Take a sharp pair of scissors or snips and make your cuts along the lines that were marked with a sharpie. Depending on how accurate your markings were, you may need to pull the slash guard down a 2nd time after making your cuts to touch up any spots that are still touching. Repeat this process for the other splash guard as well.

With the splash guards trimmed to your liking, reinstall them back on to the vehicle using the reverse process they were removed in the previous steps, reusing the same factory hardware.

Make sure all of your hardware is tight and secure on the skid and the splash guards to complete your installation, enjoy your new Catalytic Converter Skid! Be sure to check out jcroffroad.com for even more Bronco Sport products.
HELP CENTER
Articles & Guides
GembaDocs Onboarding SOPs
15 Min - SOPs, Guide

New: How to Create, Assign and Track Training Courses
6 Min - Guide

Learn GembaDocs
2 Min - Guides and Video
SOP vs Advanced SOP Guide
10 Min - Guides and Video
Explore
Support Hub
Lean Cave
GembaTalk
More Resources
Bugs & Improvements
Suggest an improvement, or report a bug, direct from the app/platform.
API Documentation
Connect GembaDocs with external systems