
Step by step on how to install the Lexus GX460 Roof Rack!
Installation Video: https://www.youtube.com/watch?v=KL1CVxSsFlo&t=1s
*Note: Rack now includes gray accent side panels and is now a 2 piece siderail design.
Questions or Support:
Phone: 269-353-1184
Email: info@victory4x4.com


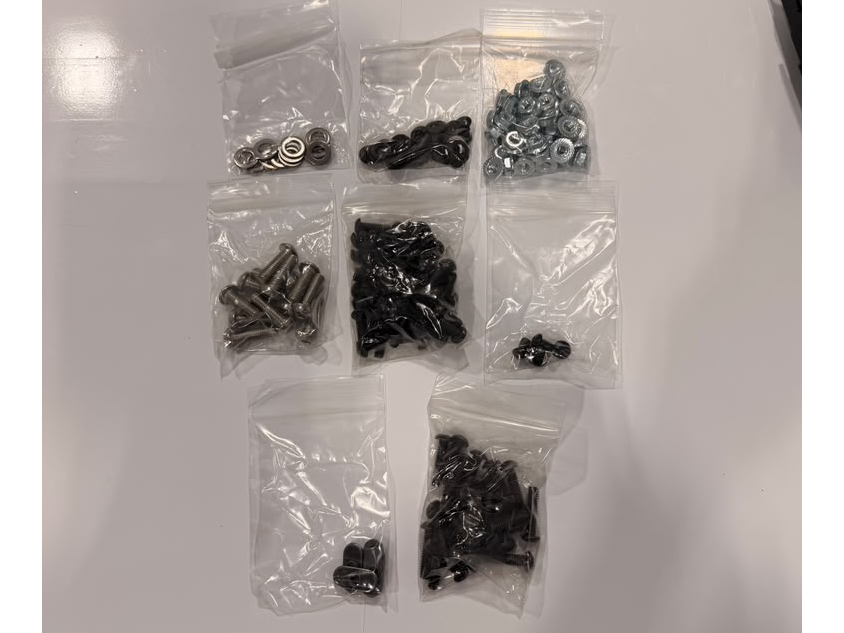
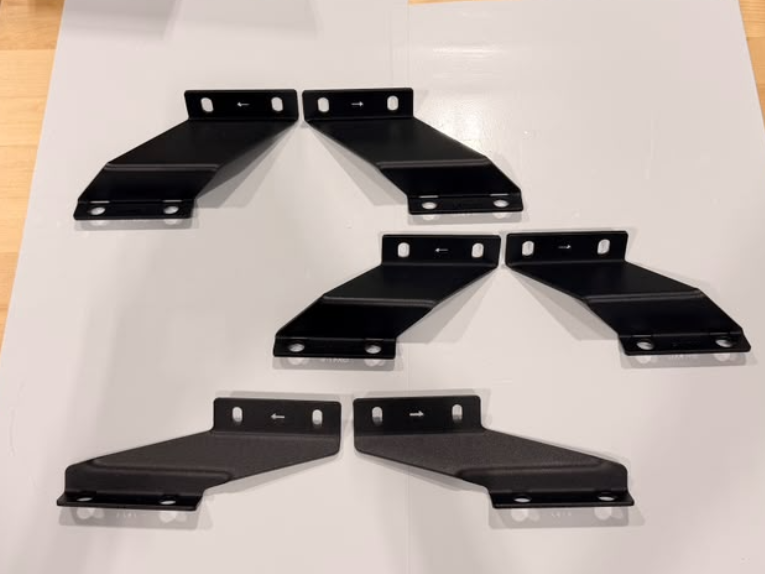


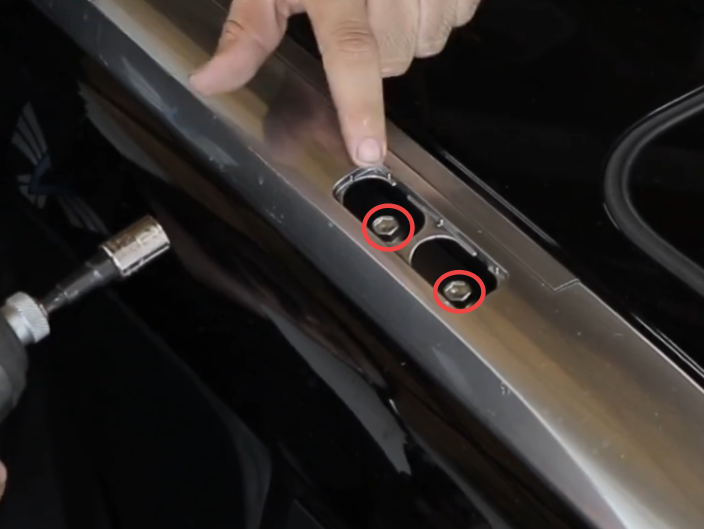
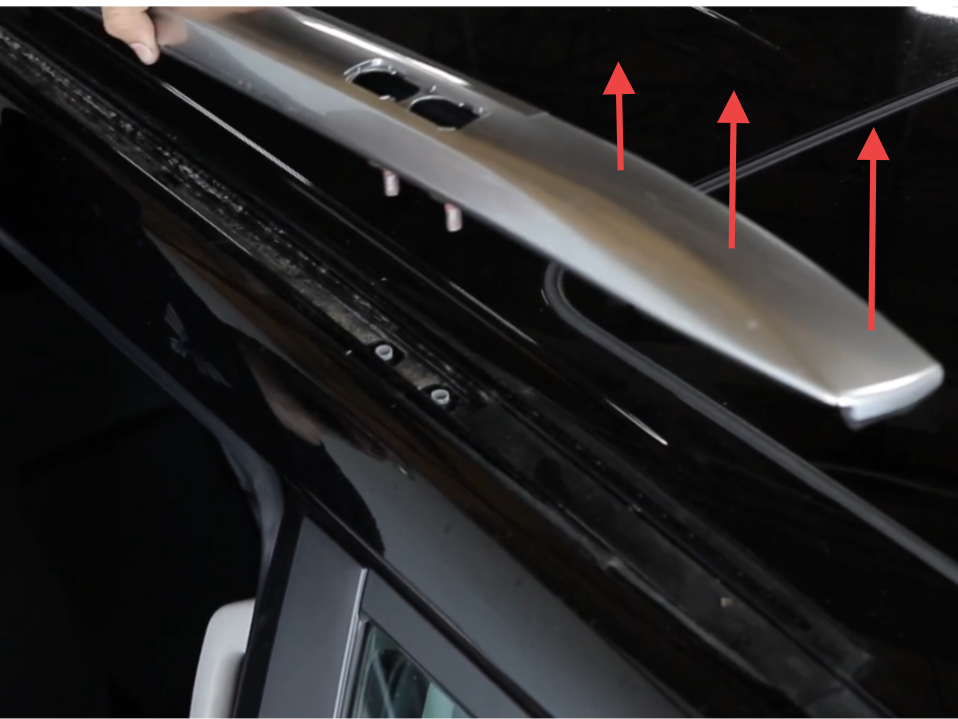
- Using a flathead screwdriver pop off the little plastic panels on the rails for all 6.
- Using a 12mm socket remove the stock bolts. 6 on each side.
- After the bolts have been removed, lift each rail off carefully by pulling up.


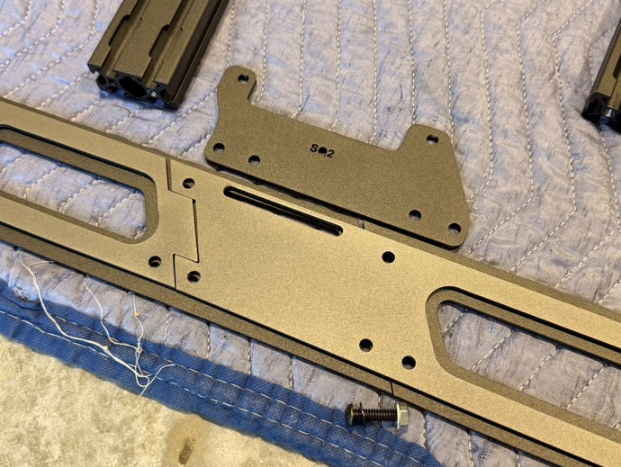
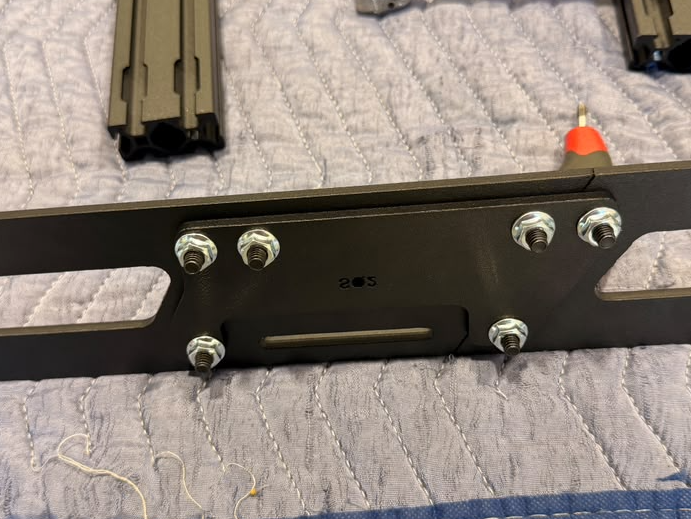
- Assemble a mirrored left and right side rail assembly using (6) of the black 1/4"-20 x 1" button heads, washers, and flange nuts as shown in the photo above. The left side rail is pictured in this example.
- Using the black 1/4"-20 x 3/4" button heads, washers, and flange nuts, fasten the side rails together in the locations shown above with the red circles. Leave the holes in the yellow circles empty for a later step.


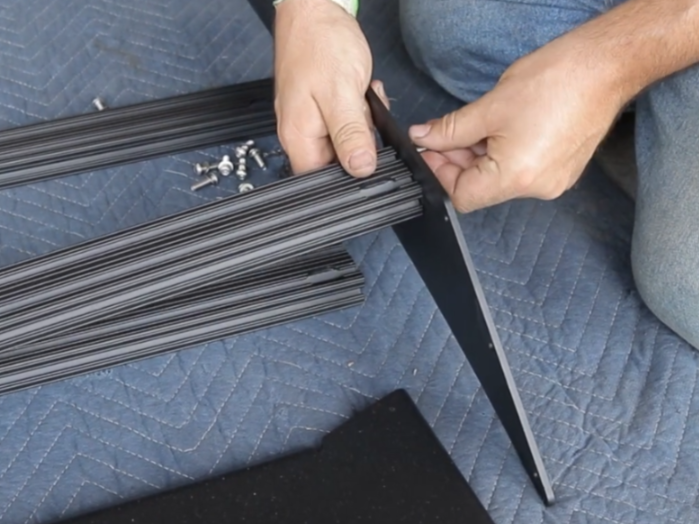
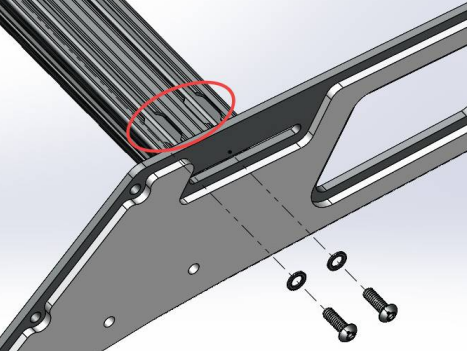
- Lay out crossbars, completed side rails, fairings, and mounting hardware.
- Orient crossbar slots on crossbar channels (for T-nuts) facing up, all to the same side.
- Align crossbar into horizontal slots on rails shown in 2nd photo.
- Attach crossbars to side rails with the 1/4"-20 x 3/4" button heads and washers.


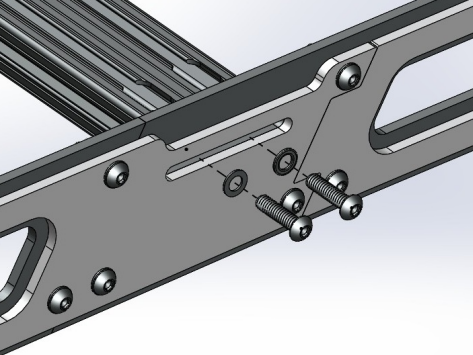
At the cross bar running thru the side rail joint you assembled in step 3, use the (2) of the longer 1/4"-20 x 1" button heads.


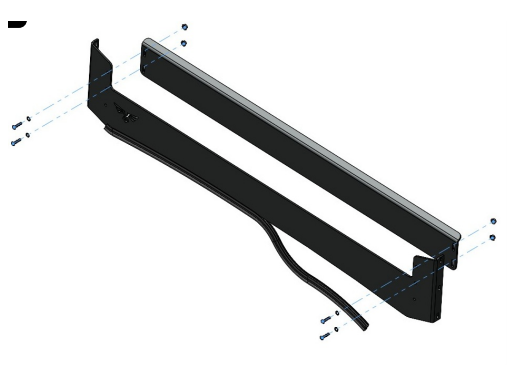
- Using four of the black 1/4"-20 x 3/4" button heads, washers, and flange nuts, assemble the front fairing in your desired configuration. (image 1)
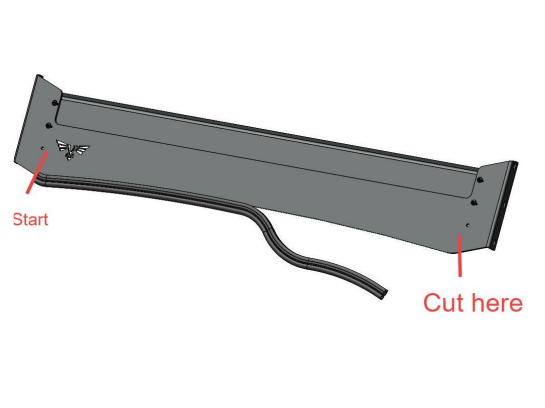
- Push the supplied edge trim on the bottom edge of the front fairing as shown. You want this trim to go just past the points on both sides of the front fairing. Cut off the excess to use on the rear fairing (you should have about 8" remaining). (image 3)


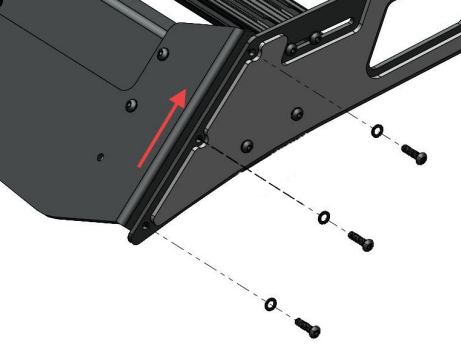
Using six of the 1/4"-20 x 3/4" button heads, washers, and flange nuts, fasten the front fairing to the rack with it adjusted all the way up. Snug by hand in this position so it holds for now.


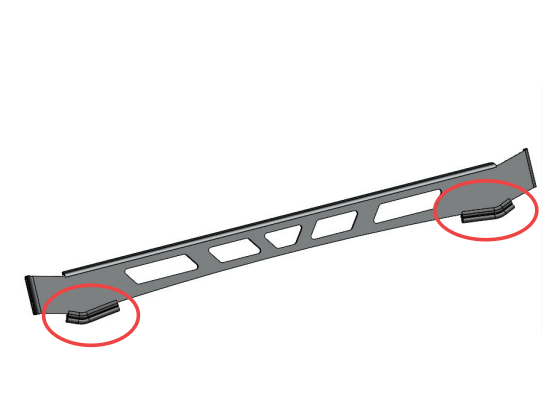
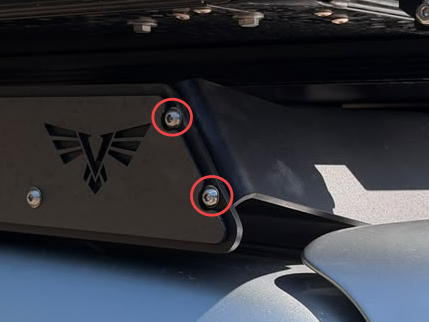
- Take your remaining edge trim from step 6 and cut it directly in half. With two identical (~4") pieces, position them on the rear fairing as shown. Starting at 1" outside of the points and pointing inwards.
- Using four of the 1/4"-20 x 3/4" button heads, washers, and flange nuts, fasten the rear fairing to the rack with it adjusted all the way up (image 3). Snug by hand in this position so it holds for now.


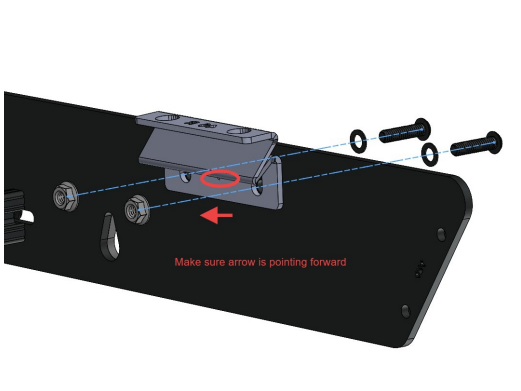
- Flip the rack over so the bottom is facing up. Using two of the black 1/4"- 20 x 1" button heads, washers, and flange nuts, fasten the rear mount in the upmost position. Snug the bolts by hand for now so they hold.


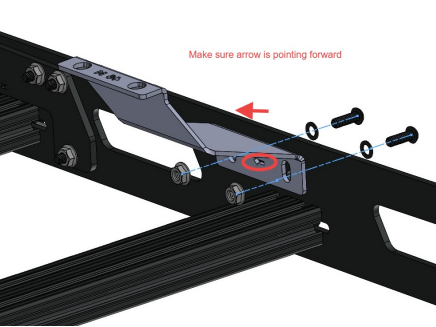
- Using two of the black 1/4"-20 x 1" button heads, washers, and flange nuts, fasten the middle mount in the upmost position. Snug the bolts by hand for now so they hold.
NOTE: Be sure that the arrow is pointed to the front of the roof rack.


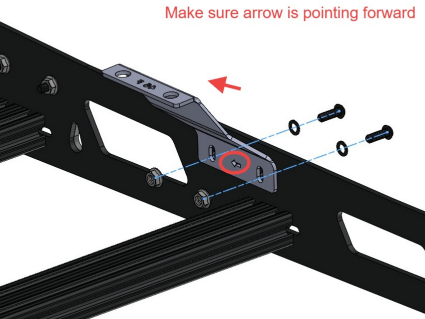
- Using two of the black 1/4"-20 x 1" button heads, washers, and flange nuts, fasten the front mount in the upmost position. Snug the bolts by hand for now so they hold.
NOTE: Be sure that the arrow is pointed to the front of the roof rack.


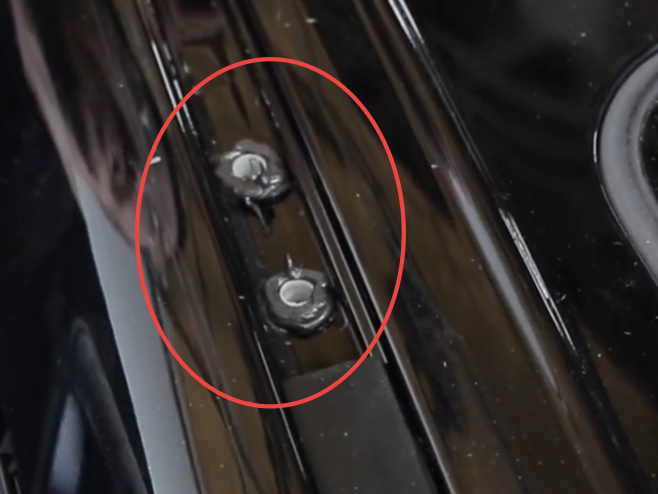
- With the factory parts removed from the roof, use silicone RTV to surround and fill each of the (8) mounting holes. Be liberal with the RTV, you cant use too much. We recommend surrounding each hole with 2-3 passes of sealant, and then "filling" the threaded holes as well. Threading the fasteners thru the sealant ensures it is totally water tight.

- With the help of a friend (or two), place the rack on top of the vehicle. Take extra care to set the rack directly over the mounting holes, you want to avoid the need to move the rack laterally once it is sitting in the sealant.


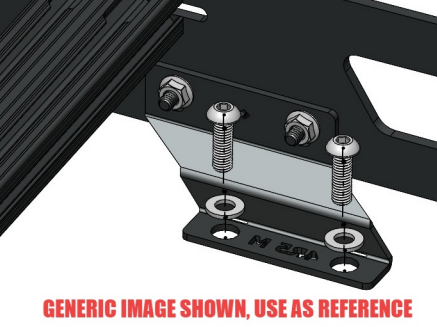
- Using the supplied M8x1.25mmx25mm button heads and washers, attach the rack to the roof by threading the bolts through the RTV and into the factory 8mm holes. Be sure to get all 12 bolts started before tightening any of them. When all the bolts are started, tighten each of them firmly by hand. This should be done when the RTV is still wet.


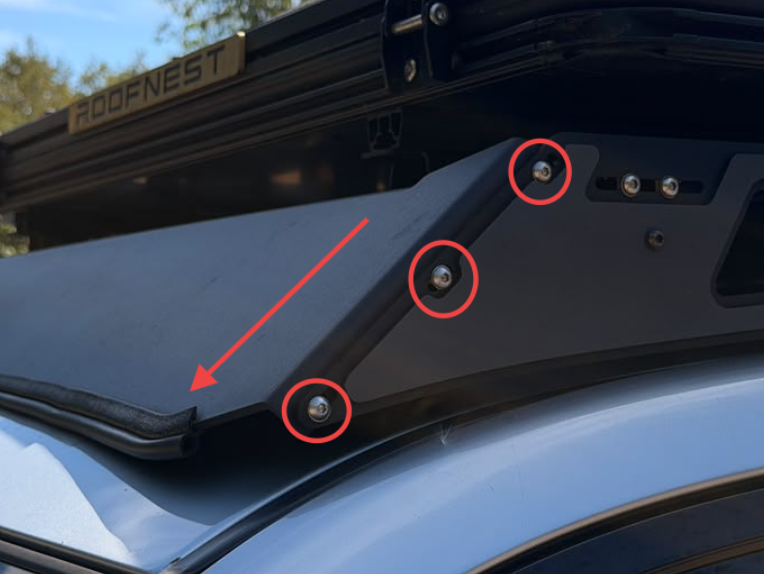
- With the front, mid, and rear mounts bolted firmly to the roof, adjust the position of the rack by loosening the mounting bolts on the side rail until there is and equal gap between the bottom of the side rails and the roof down the length of the vehicle. Then re-tighten the mounts into place.
Adjust the front fairing down to the roof until it is touching the roof.


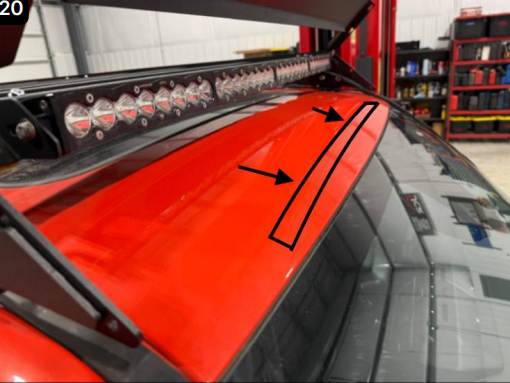
This step is optional but highly recommended: Paint protection film is not included, but can be used along with the included weather stripping. If not using paint protection film, skip to step 18.
- Adjust the front fairing down to the roof until it is touching the roof. Mark with masking tape where the edge trim is making contact with the roof. Temporarily remove the bottom two bolts on both sides and apply 3M Paint Protection Film along the locations that trim contacts the roof.
- Reinstall the four bolts into the front fairing and adjust to desired location.


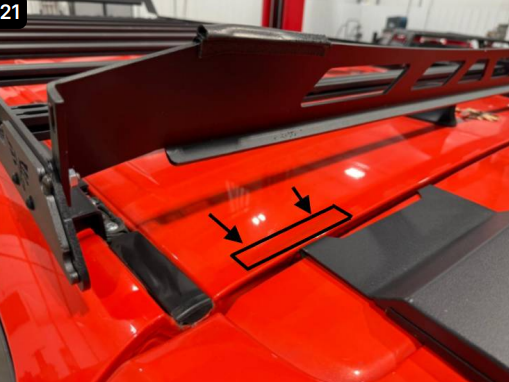
This step is optional but highly recommended: Paint protection film is not included, but can be used along with the included weather stripping. If not using paint protection film, skip to step 18.
- Adjust the rear fairing down to the roof until it is touching the roof. Mark with masking tape where the edge trim is making contact with the roof. Temporarily remove the rear fairing bottom bolt on both sides and apply 3M Paint Protection Film along the locations that trim contacts the roof.
- Reinstall the two bolts into the rear fairing and adjust to desired location.

- Confirm all hardware is tightened.
- Congrats! Your installation, is now complete. Enjoy!
HELP CENTER
Articles & Guides
GembaDocs Onboarding SOPs
15 Min - SOPs, Guide

New: How to Create, Assign and Track Training Courses
6 Min - Guide

Learn GembaDocs
2 Min - Guides and Video
SOP vs Advanced SOP Guide
10 Min - Guides and Video
Explore
Support Hub
Lean Cave
GembaTalk
More Resources
Bugs & Improvements
Suggest an improvement, or report a bug, direct from the app/platform.
API Documentation
Connect GembaDocs with external systems